Before you begin
To add a LinkedIn account you will need the login details to hand. For security, the details will be encrypted and only stored on the computer that you add the account.
You will also need to be able to access the email account related to LinkedIn so you can complete any security checks if required.
You need to add the account directly in the desktop Engine software. When you add the account the login details will be encrypted and saved only on the computer you add it on and this will become the account’s “Base Engine”.
Going forward all of the automated activity will be carried out by that instance of the Engine and if you install the software on other computers they will act as “Linked Engines” allowing you to log in from other systems securely.
This means if the password for the LinkedIn account changes in the future you will need to come back to the Base Engine the account is connected to and update it there.
Add Your Account
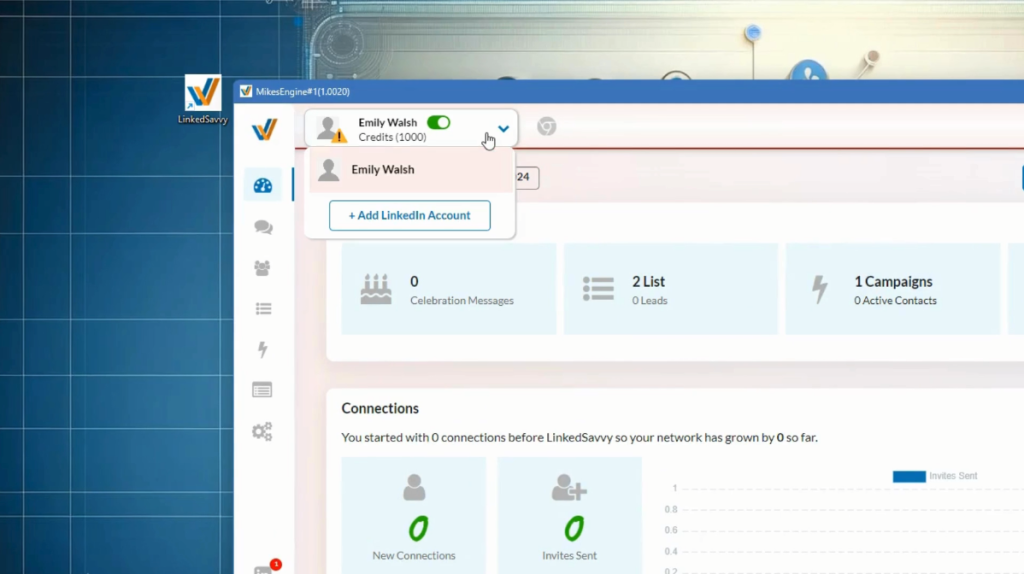
To begin, click on Add LinkedIn Account in the LinkedIn Accounts screen which you can access from the Side Menu or click Add Account from the Account Switcher in the Top Bar.
Choose a plan.
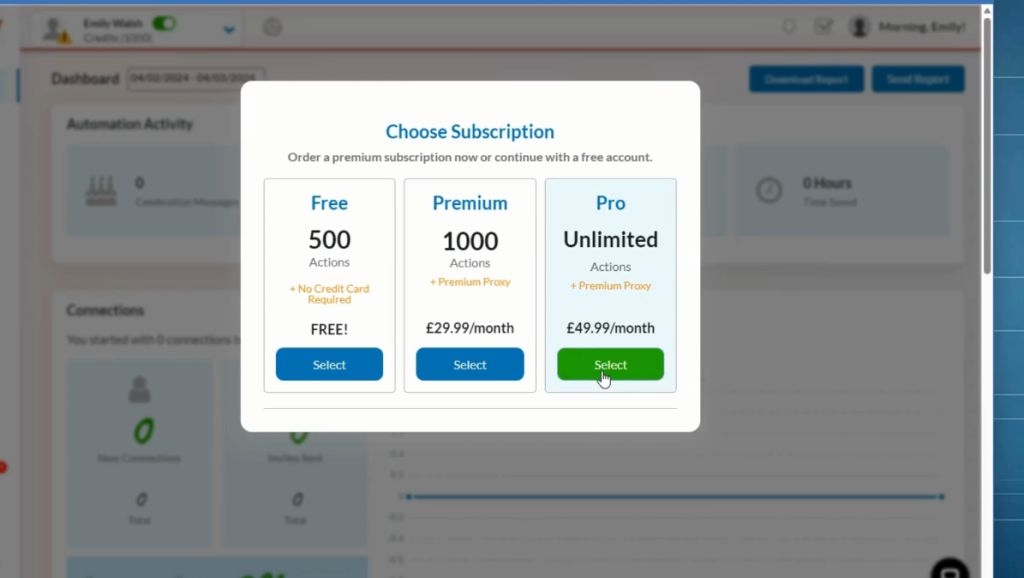
There are no feature restrictions between the plans and they are only limited by the amount of activity you want to automate.
We use a credit system where every task, such as sending a message or an invite to connect costs 1 credit.
You can upgrade and downgrade an account at any time and you pay month to month. You are also welcome to use a free account which provides a generous number of credits every month at no cost (we won’t even ask for a credit card).
Once you select an account you will be redirected to our billing hub to complete the order. From here you will be able to manage invoices and get support if you need it.
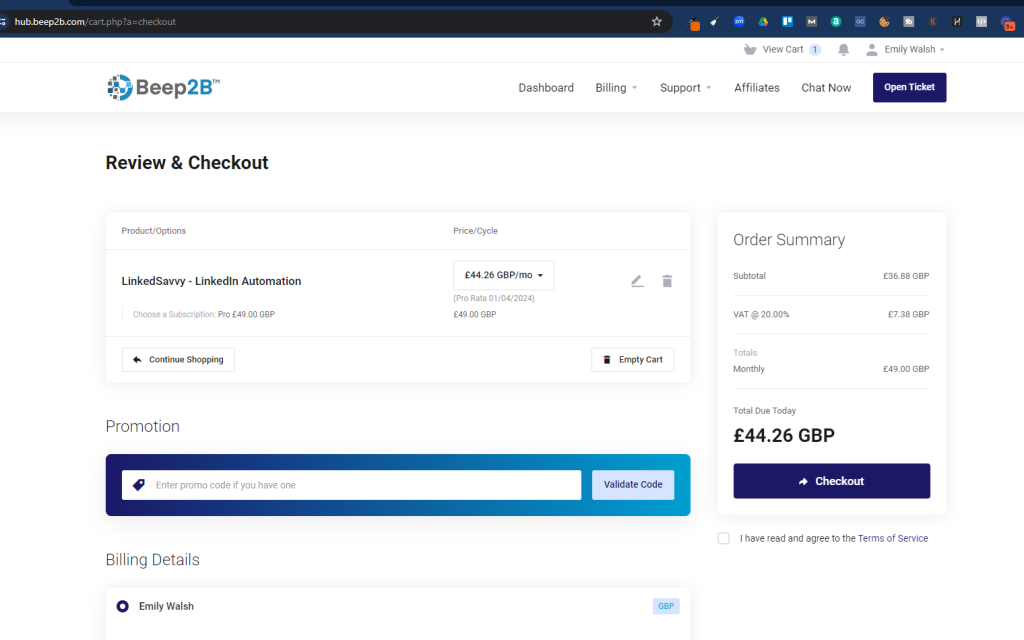
Once you have finished checking out, click continue.
How you want the account to connect to LinkedIn.

You can choose to use your local internet connection, this is ideal if you are running LinkedSavvy on your own computer for your own account.
For the more advanced users, you can set a private connection, or proxy as they are sometimes known.
If you have selected a paid plan we will provide a high-speed dedicated connection exclusively for this account to use behind the scenes. Just select the Premium connection and choose the country you are based in.
Please note, If you are managing more than one account you must use separate connections for each account to avoid LinkedIn restrictions.
Account Test Login
The final step is to enter your LinkedIn login details and test everything is connected.
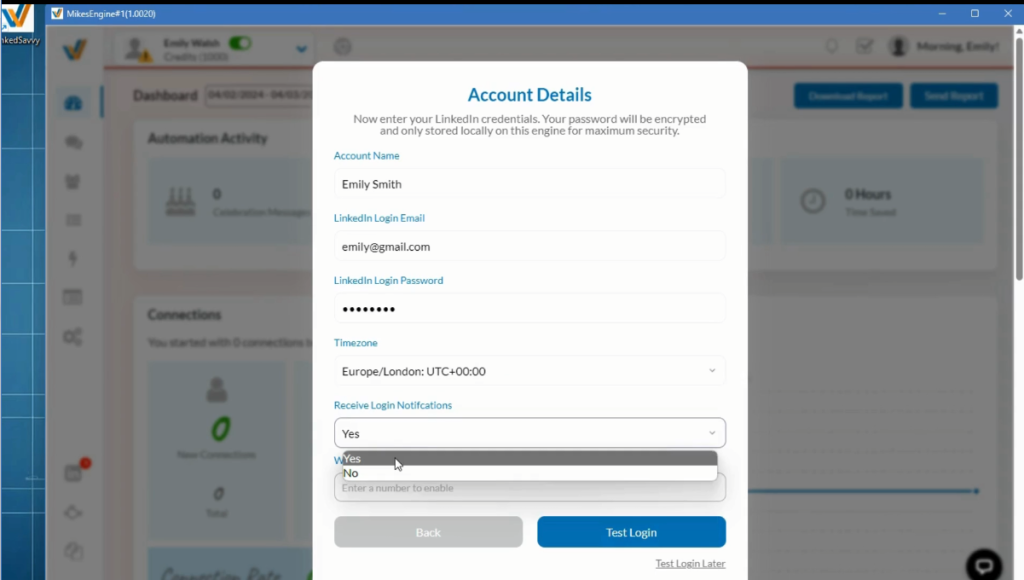
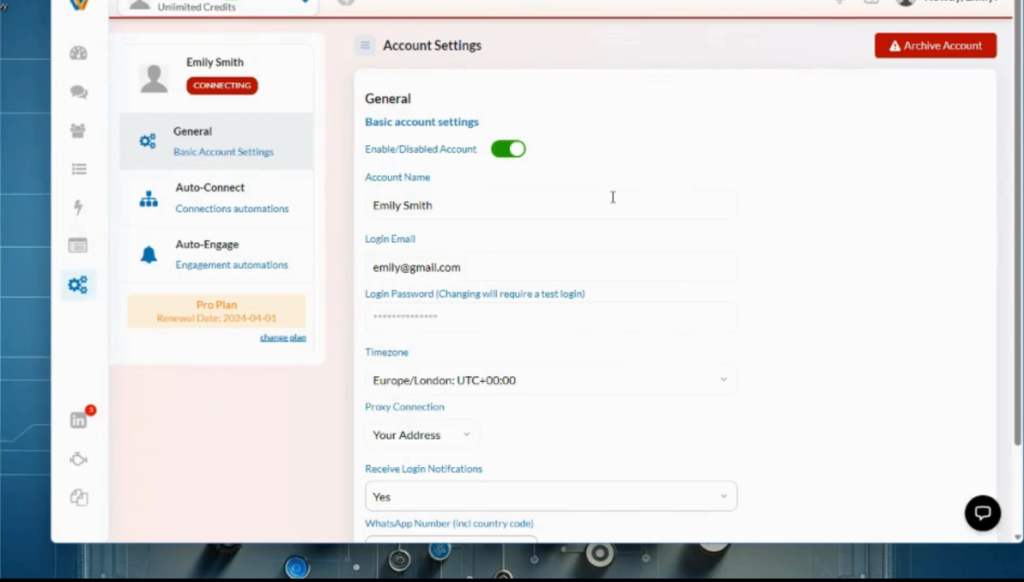
Enter the name on the LinkedIn Account
Now enter your LinkedIn login details.
Select the timezone you normally work from which will be used to manage scheduling.
Lastly, choose whether you want to receive notifications relating to login problems directly to the email address for this account.
We recommend setting this to yes so you can solve any problems quickly reducing any downtime on your Campaign activity.
All notifications that are sent directly to the LinkedIn account holder are sent from a “Secure Client Management” email and the account holder will be directed to an unbranded webpage where they can enter a PIN code, update their password or confirm verification directly.
If you run an Agency this feature is especially useful to keep multiple client accounts connected without having to contact clients directly without diluting your brand.
Once you have entered all of the details click on Test Login to complete the process.
As the system checks the login you will see a Google Chrome browser open and navigate to LinkedIn.
It’s crucial that you do not manually type the login information into the browser and wait for the software to do it automatically.
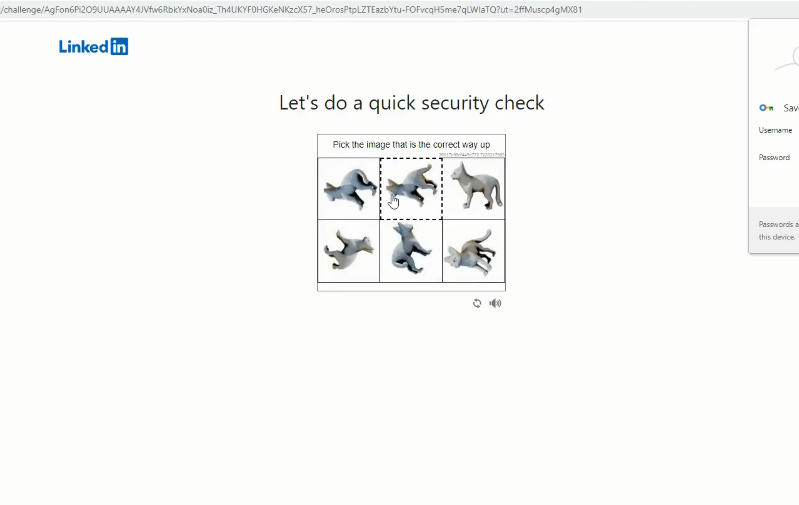
It’s very common for LinkedIn to run some checks before allowing access.
If you see a puzzle or word to type go ahead and complete the challenge.
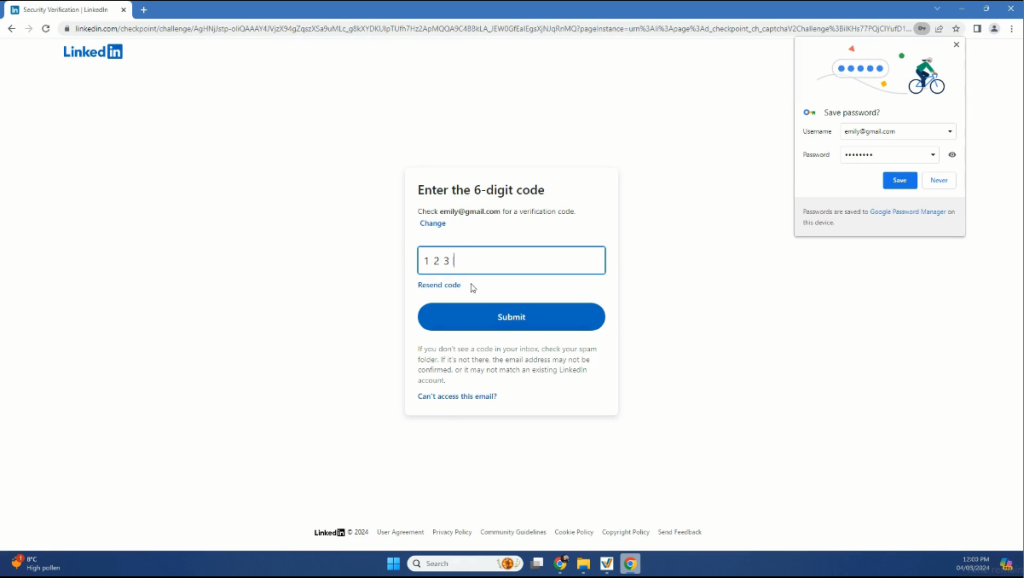
LinkedIn may also require you to enter a PIN code which they send to the accounts email address.
Once you enter the PIN give the system a few moments to recognise the login has been successful and alert you that the account has been connected.
Occasionally the account may get disconnected and if you ever change your password you will need to update LinkedSavvy too.
If LinkedSavvy has a problem logging in you will receive notifications in the app, by email and optionally Whatsapp too with instructions on how to solve the problem.
In the future if you need to change any of the settings related to the LinkedIn account, you can click on the Settings link in the left sidebar. You will notice that the Engine you have added the account from will be listed here too.
Congratulations you have connected your account and you’re ready to start generating leads!